Getting Started With ReadyAPI
Ready API is the rebranded SOAPUI Pro, which can be used for testing both SOAP services and REST services. This is a licensed tool , which offer 14 days free trial for all features. ReadyAPI provides lot for upgrades compared to free open source SoapUI . Major advantages to support functional testing of REST APIs are dynamic data sources, assertion groups, scripting , advanced property transfer etc. Full list of differences between ReadyAPI and Soap UI can be found here .
Below blog post , shows step by step process to do basic REST API test.
- Start a new project :
This can be done via FILE >> New Empty Project . Once the project is created, save it somewhere.
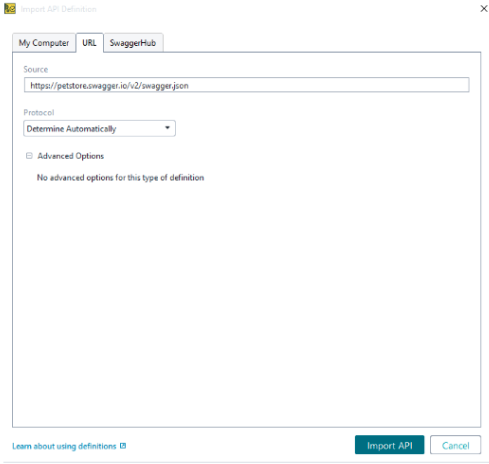
- Import API Definition:
For this tutorial, I am using the petstore API . The json file with specs is available at https://petstore.swagger.io/v2/swagger.json . In order to import, right click on API folder in ReadyAPI project and select Import API Definition. It provides different tabs on the popup. Select URL tab and paste the json path. Click Import API.
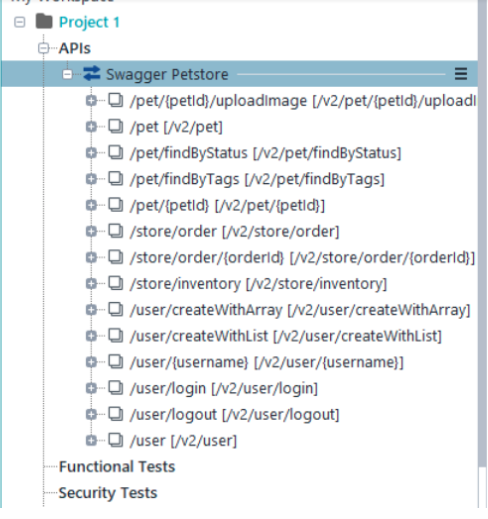
As you can see , it list out all available methods . We can expand the drop down and reach the request . Fill in required details and execute this. For eg: if we need to need to execute findPetsByStatus, we can navigate to that , fill in a valid Status and click Send.
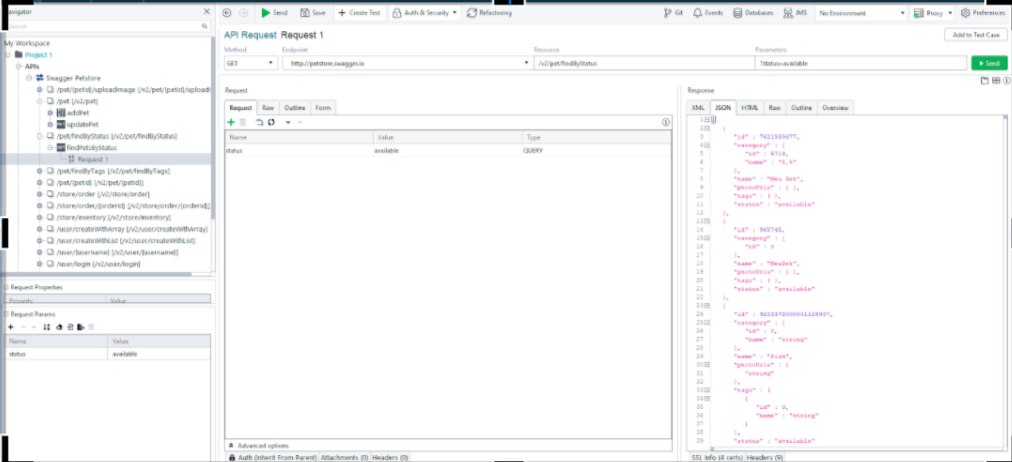
Note: If we need to add authorisations, it can be done in “Auth” tab. Details of Header can be specified in Header tab.
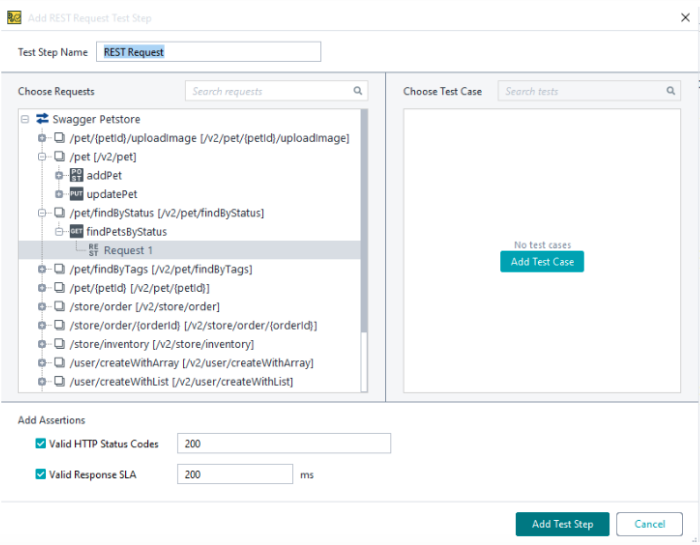
- Now let us see how we can create a test cases for this. Right click on the request and select Add to test case. This will show a new popup where we can select existing test case or create a new one. It also provides 2 basic assertions to be added. One assertion is to check response status code is 200 and other one is to check response time is within 200 millisecond.
After adding test case, it will look like below. Test cases are added under Functional Tests folder.

Run the test by clicking Send Button . We can also run the test by selecting the Testcase folder or test suite folder and clicking on Run . As a rule of thumb, it runs all request coming under that folder. For eg, running a test suite runs all test cases under it . Running a test case run, all steps under it.
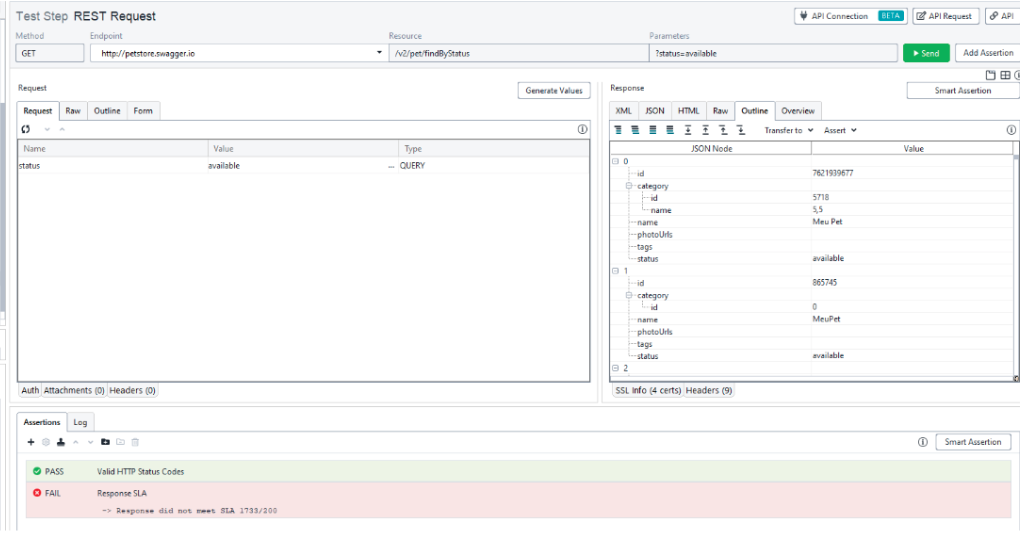
Above shows that we received a response and one assertion failed. The response time was 1733 millisecond instead of expected 200.
- Any test automation is only as good as the assertions added to it. Let us look in detail about the steps to add assertions. Click on the + button on assertions tab. That will provide a list of possible assertion
Smart Assertion : This is a new feature which allows to automatically assert on all received data and meta data. It allows to selectively ignore few data and also to make assertion case insensitive if needed. Use this assertion with caution since it is heavily depended on server returning same json response everytime ( including order, timestamp etc).If there is a possibility for data to be added/ deleted/modified, then it is better to avoid this assertion to reduce flaky test cases.
JSONPathcount : This allows to do validation on count of data returned.

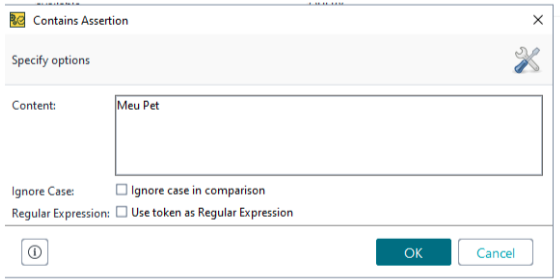
Contains : This allows to check the response content has a string we specify.
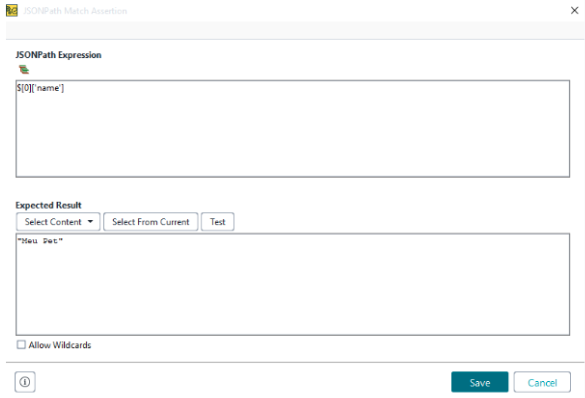
JSONPath Match assertion : This allows to check specific fields in JSON response. There is an icon which allows to select the field to validate and create JSON Path automatically.
Script Assertion : This can be used for complex assertions which is not available readily from ReadyAPI. I will create another blog post for the same