Postman Tutorial
Recently one of my colleagues has asked me to train him on using postman and Newman for API testing. Below is a cut down version of training session which I took for him.
What is Postman
Postman is an Http client for testing web services. It has a friendly GUI for constructing request and analyzing the response. There is a command line tool called Newman for running the postman collections from command line. This will help to integrate postman to other testing tools.
How to Install
Postman is available as both chrome extension and also as a native install. Native install files can be found here.
Example - GET Request
In order to trigger a get request, we need to identify below information
- URL of API
- Authentication details
- Header details
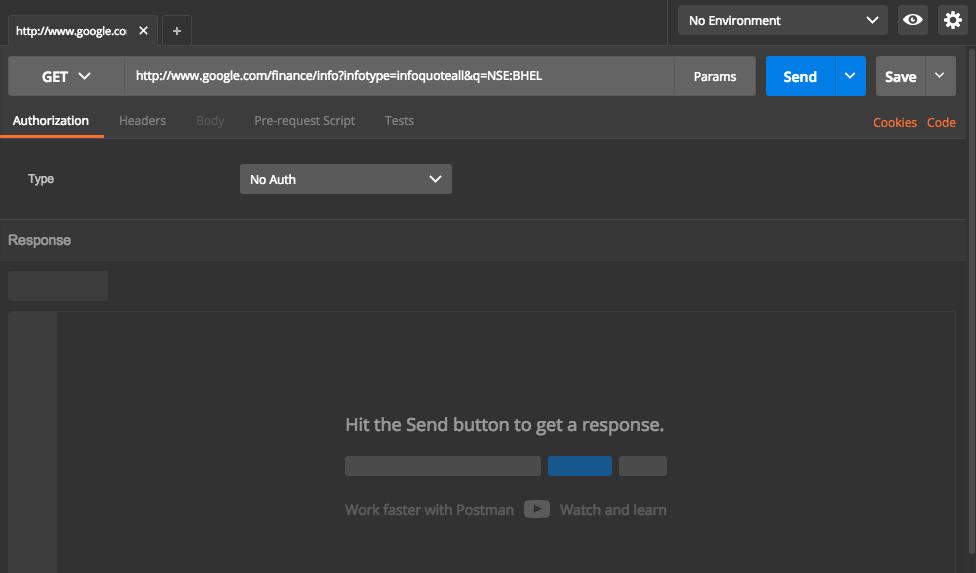
For this example, let us look at a google finance API. API URL(including parameters) is http://www.google.com/finance/info?infotype=infoquoteall&q=NSE:BHEL
There is no authentication details and header details that need to be passed with this. The params button will list down various parameters passed in a tabular format , which makes it easy to edit.
In postman, Select drop down as GET and enter the API Url. Screen will look like below
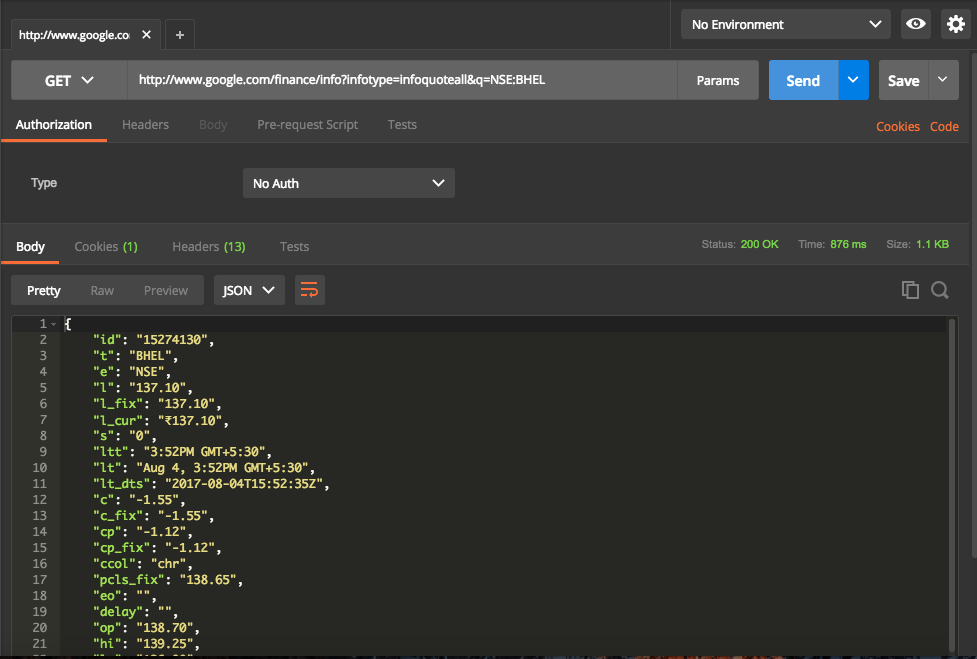
Now hit Send button. This will trigger a call to API and get the response which will then displayed in UI. Screen will look like below
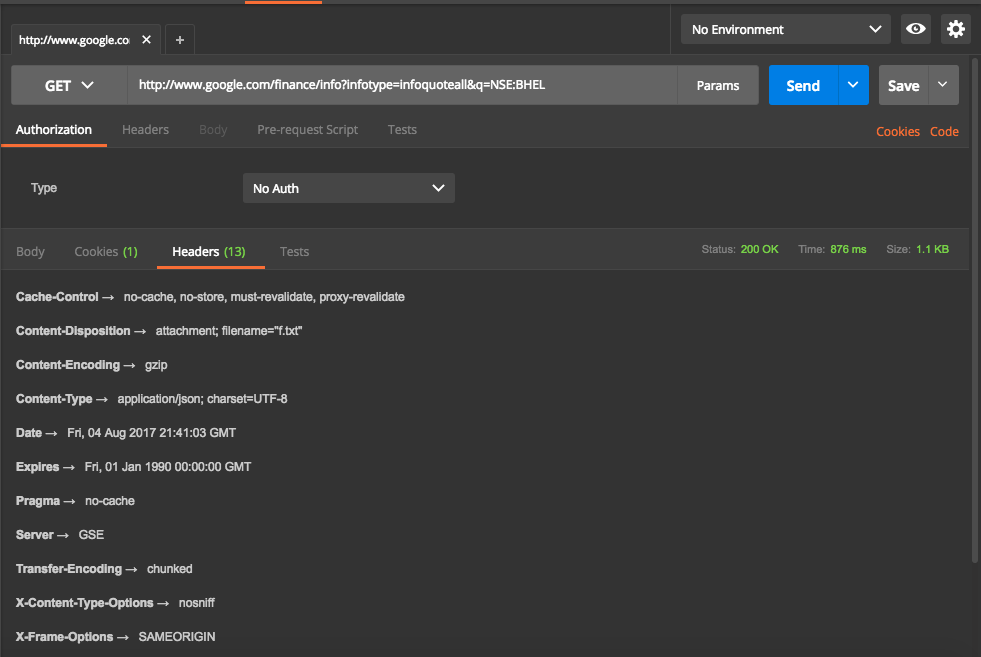
Headers returned are
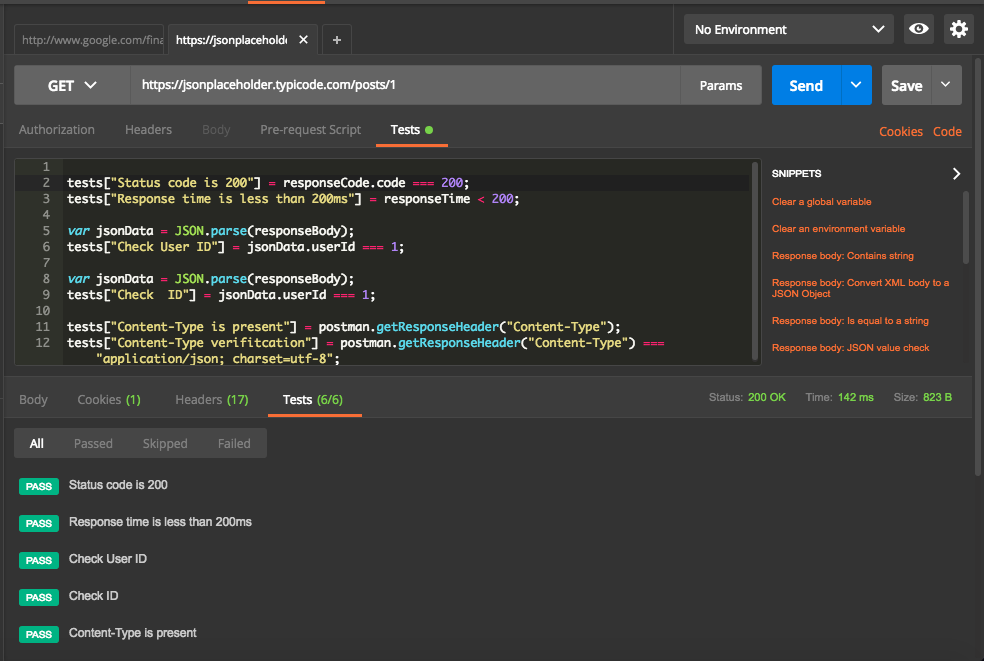
Writing Tests
Above is an example of calling an API and analyzing its response. Postman also has a facility to write test cases to verify the response. Test cases are written in javascript. Tests are run after the request is sent and it will allow access to response objects. The editor also provides commonly used code snippets which make it easier to write test.
The Below example is written for calling one of free API mentioned here. In this example, we have test scripts for checking status code, values in the header, values in response, response time. We can even expand the test cases to complex verifications by writing javascript tests.
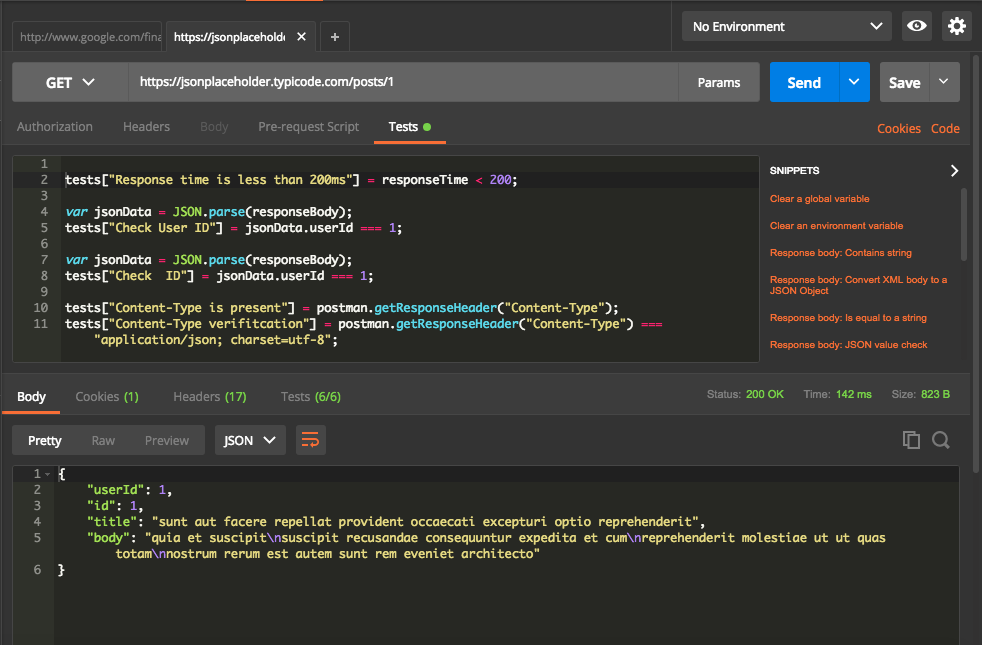
We notice following from above screenshot,
- 6 test cases written on the top part to check for the status code, response time, header and response.
- The response received on the bottom part.
- Test tab shows that 6/6 test cases are passed ( in Green).
Now let us dive into details of the test results. Below screenshot shows details of test cases and their status.
Collections
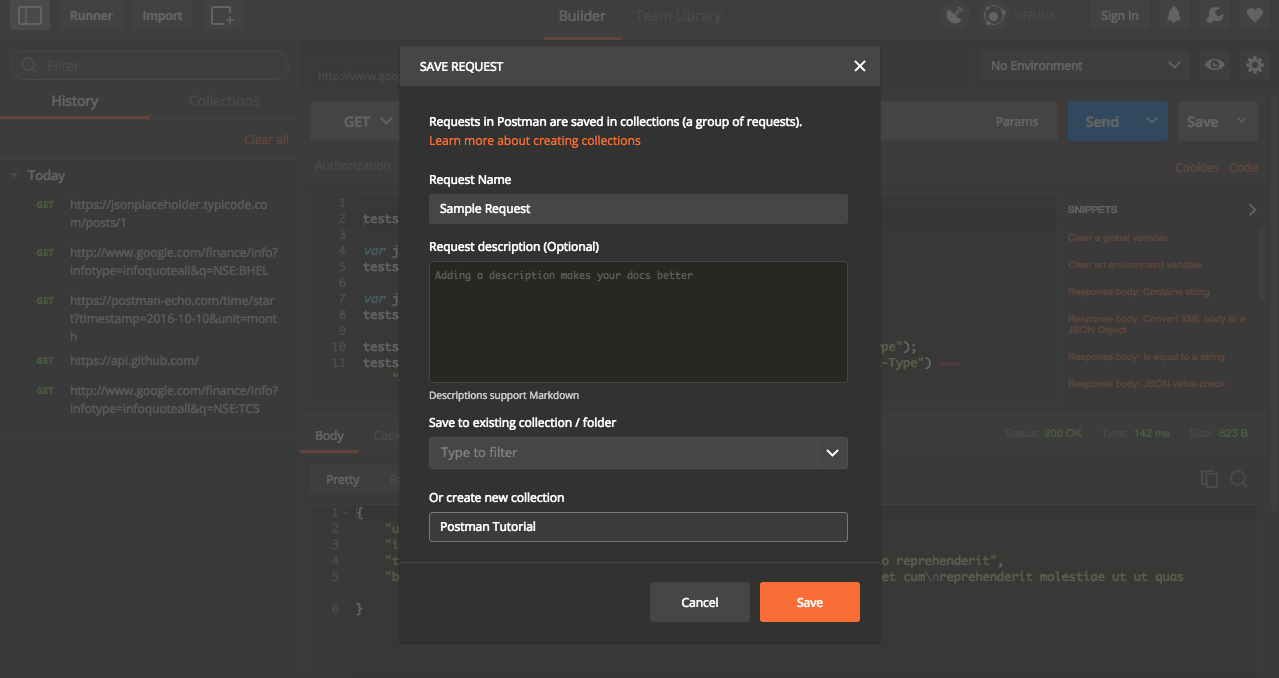
We can save the current request and it associated tests ( if any) for future use in postman. It can also be exported and shared with others. Select option as Save As from drop down next to Save. We can specify request name, provide a description and select a folder and sub folder to save the response.
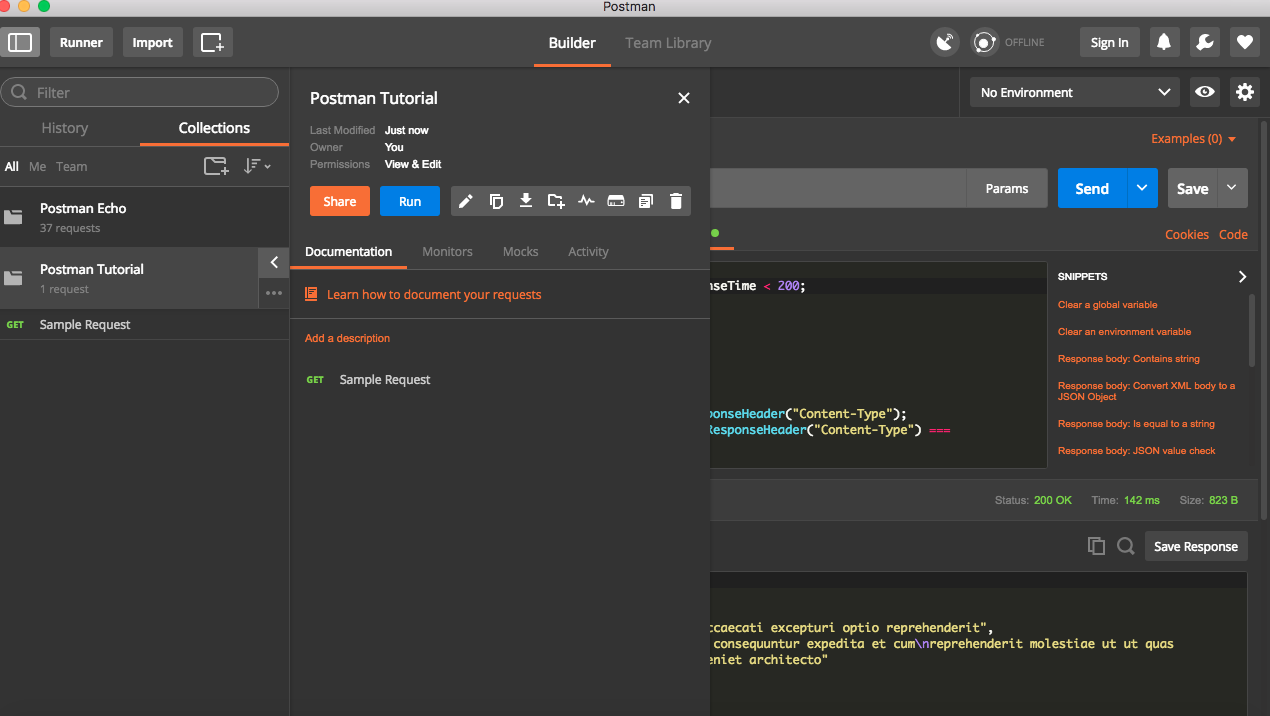
Once saved, it will be available for use in collections.
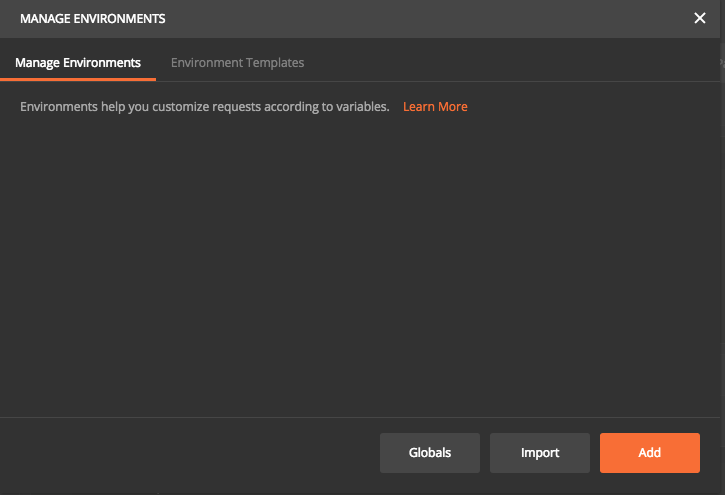
Environments
Very frequently, we will have to run API test in different environments. Most of the time, there will be few differences in the requests, like different URL. In such cases, we can use environments in Postman.
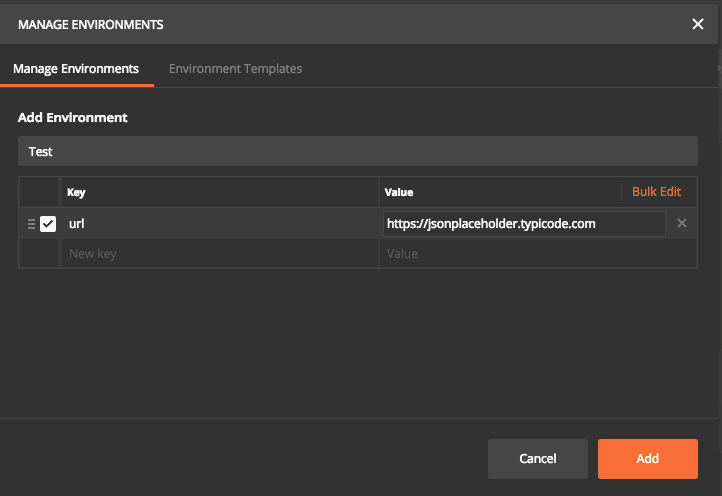
Click on the Settings button on top right corner and select Manage environments. This is open up a new pop up where we can add Environment or import an existing environment file. For this tutorial, we will use Add option.
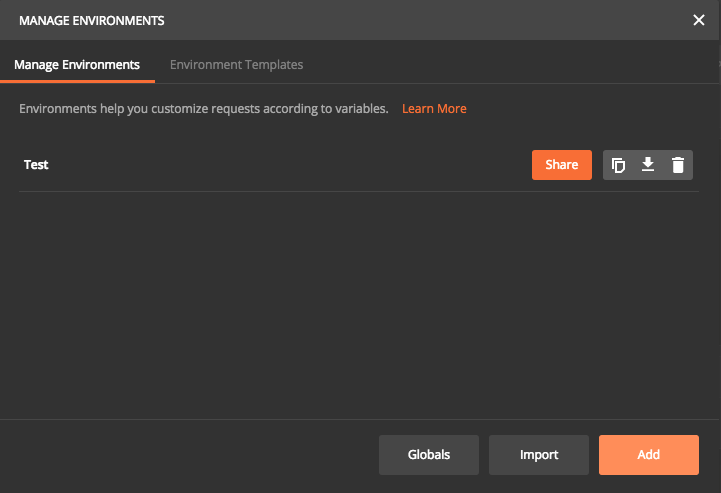
Now we can specify all unique parameter for each environment. In this case, I have given a key called “URL” and entered corresponding values and saved it as an environment named Test.
Now let us run the request using environments. First step is to replace https://jsonplaceholder.typicode.com with url in double curly braces. Then select Test in the Environment drop down at the top. Now click send. This will execute the request and run all associated test cases. Postman will dynamically replace with corresponding URL value specified in selected environment file. So assuming we have different environment files, each time the request will be sent to different URL based on environment selected. We can have any number of keys and values in one environment file.
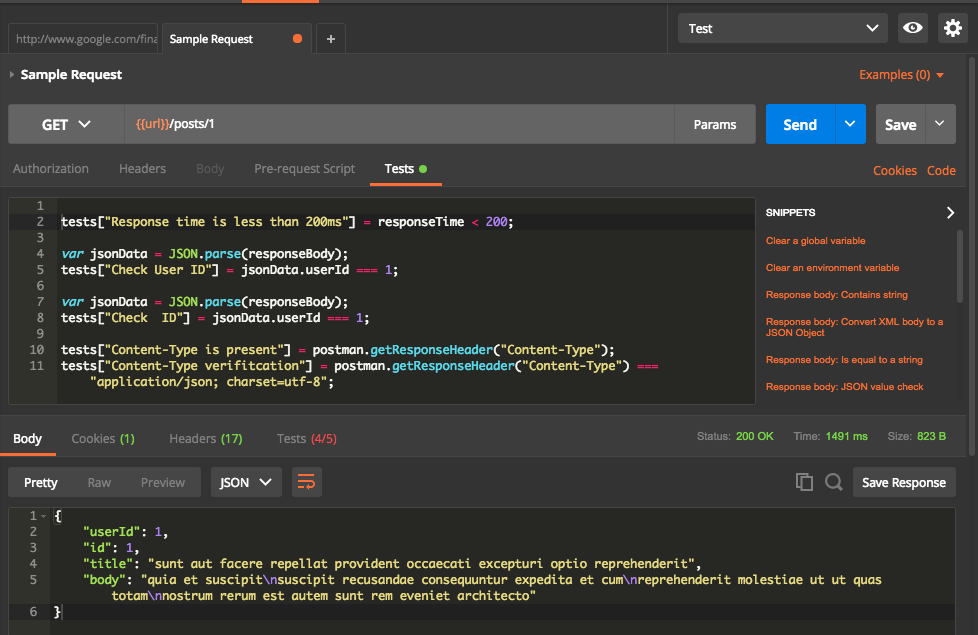
From above, we can see that one test case is failed. Let us have a look into failed test case.
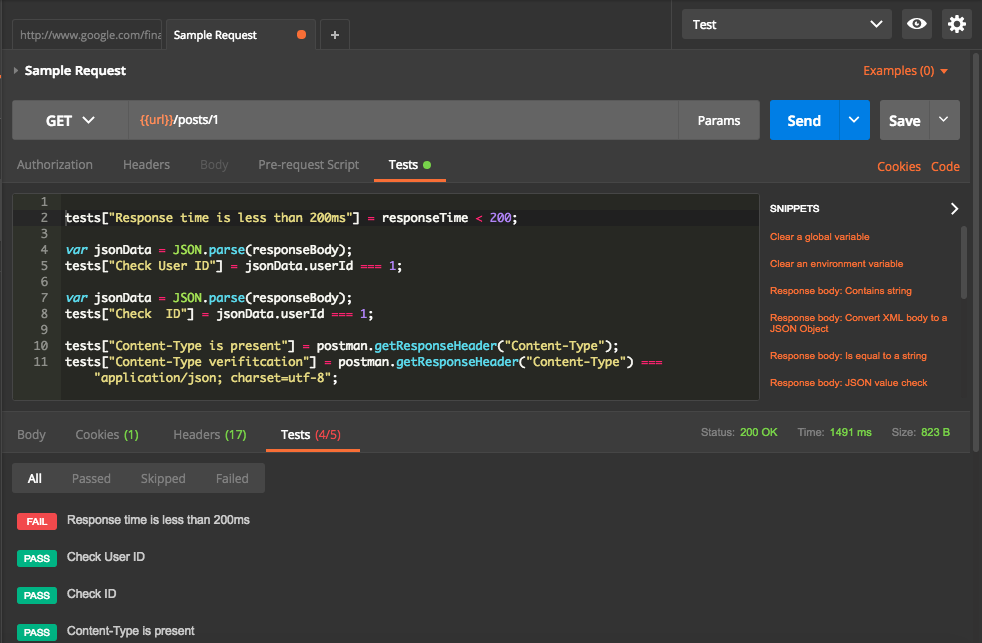
Failed test case is for the time taken for the response. Current request took 1491 ms which is higher than expected 200ms.
Exporting Collections and environment files
Postman provides facility to export collections and environment files as JSON. This helps to share the details with other team members and also to use Newman for running postman collections. Let us have a look into how to export them.
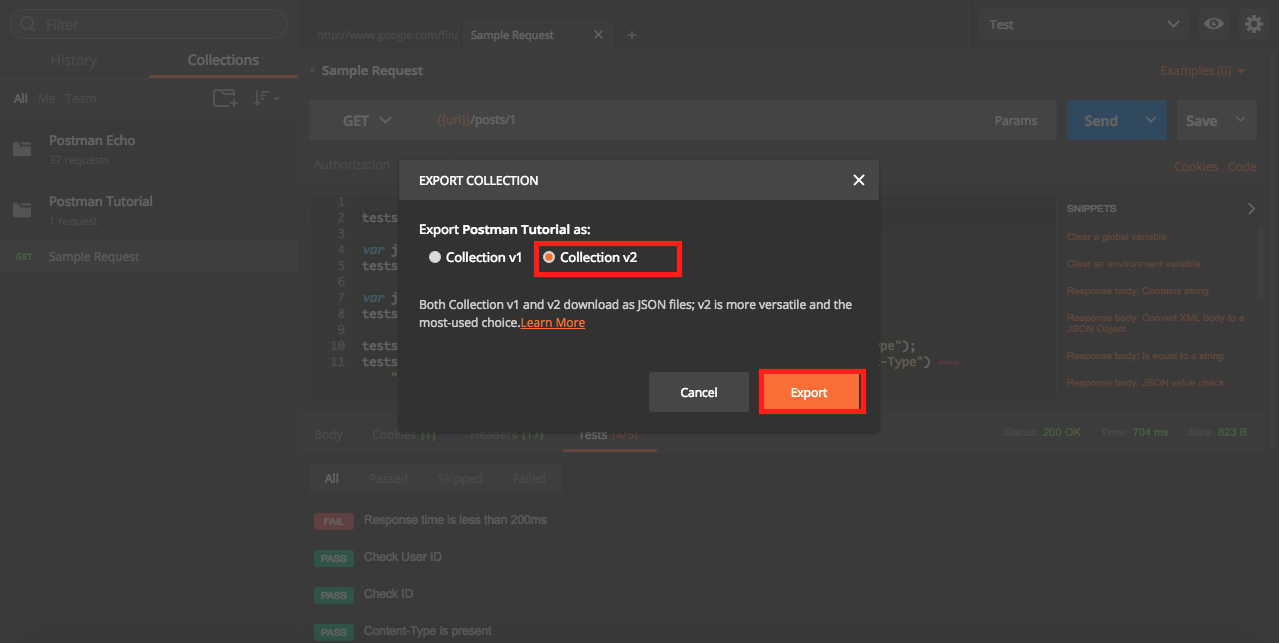
Exporting Collections
- Click on Collections Tab.
- Click on
...next to Collections Name. - Click on Export.
Select V2 option and save the file.

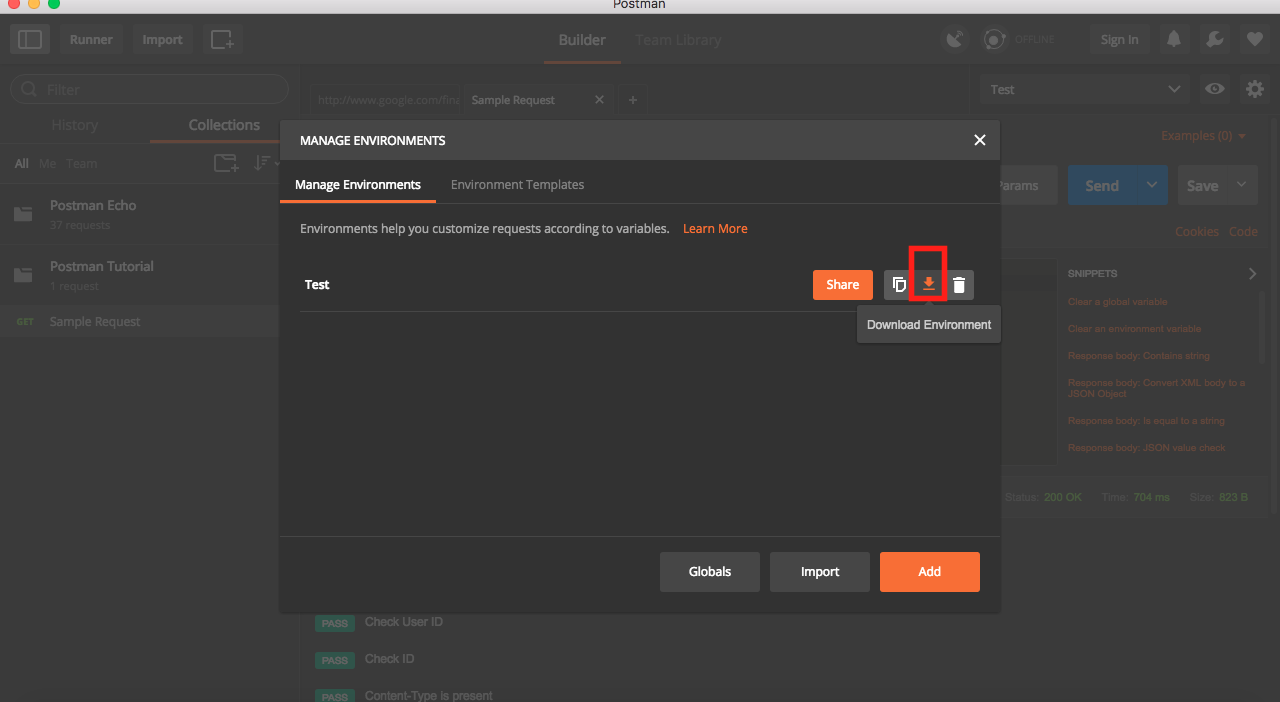
Exporting Environment File
- Click on Settings button on top right corner.
- Click on Manage environment.
Download the file.
Running Collections Using Postman Collection Runner
Postman provides a feature to run collections using collection Runner.
- Click on Runner button on Top left to open collection runner
Select Collection name in drop down and select environment and then hit
Start Run.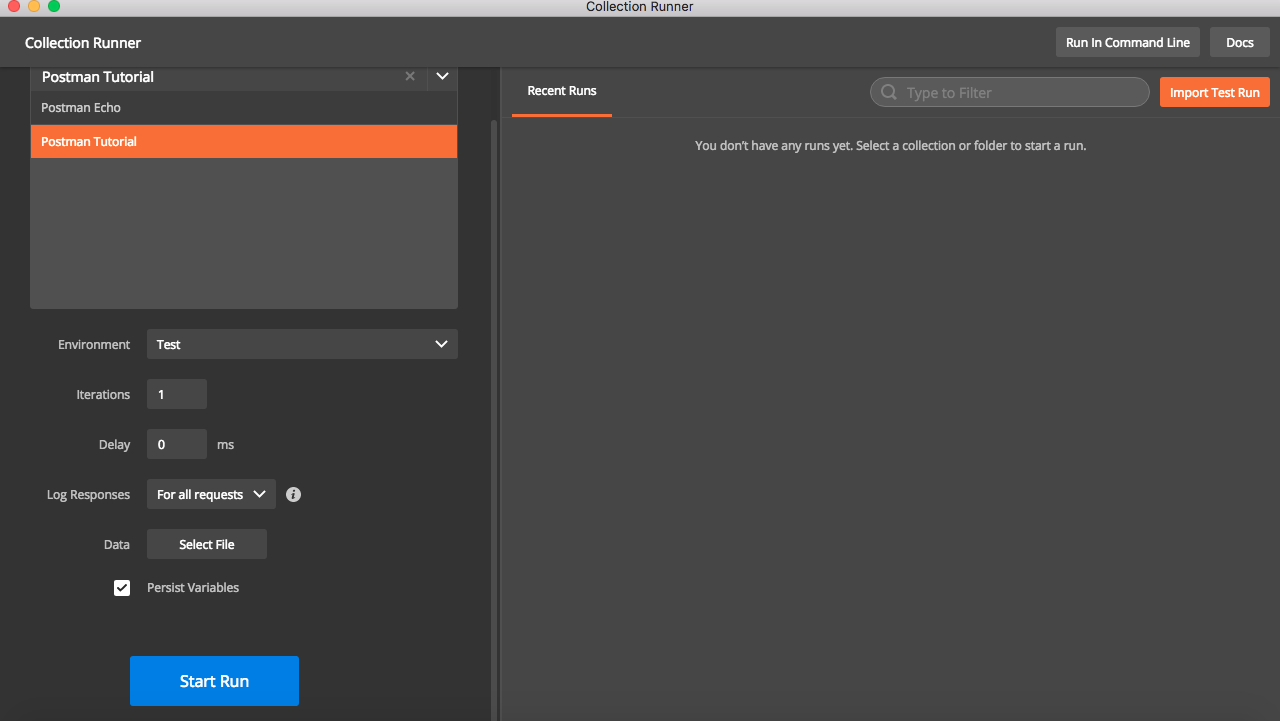
This will trigger execution of request and test cases mentioned in collection and results will be shown. Also note that collection runner has additional options like number of iteration, delay before sending request , input from data file etc .
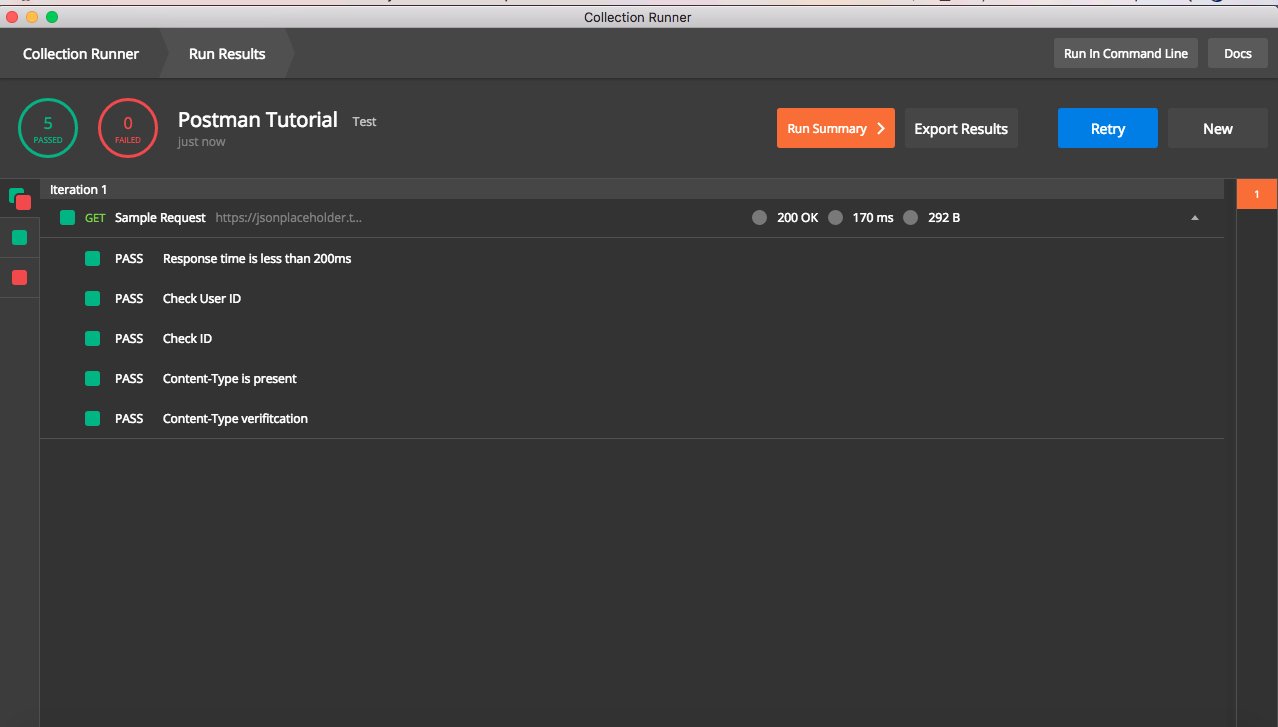
Once execution is complete, result will be shown like below. It will have details of all assertions done and options to export results for future verification.
What Next ?
In this post, I have explain basic usage of postman for API testing . However the functionalities provided by postman is much more than above. We can also use Newman , which is command line collection runner , to execute collections. I will write another post about it sometime soon.